How to Solve the WordPress max_execution_time Problem: Sometimes you may face such errors in WordPress. Similarly, you will face the problem of WordPress max_execution_time error.
This is one of the common errors and you do not have to be afraid of it. The good thing is that you can easily solve it.
Let’s begin!
What is the WordPress max_execution_time Error?
You can see the wordpress max_execution_time fatal error in the wardpress admin panel given below.
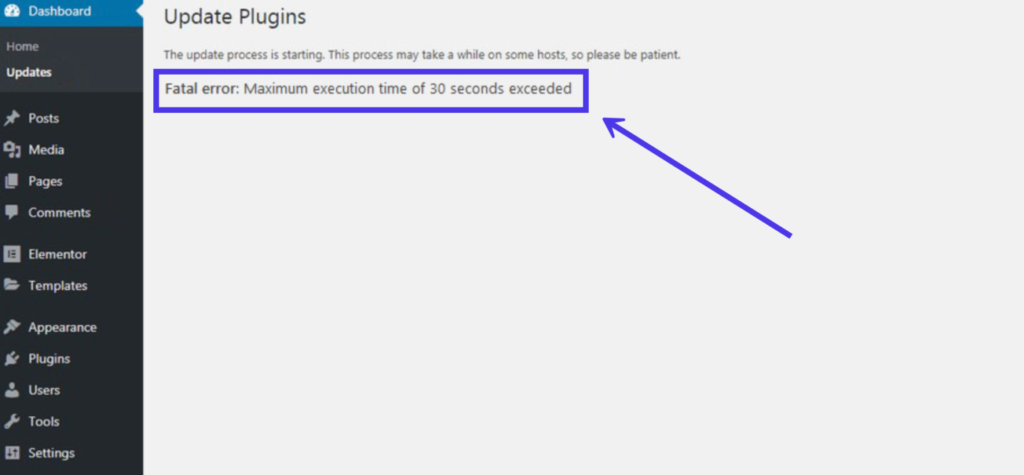
The error message is given below.
"Fatal Error: Maximum execution time of 30 seconds exceeded"The 30 seconds value can be any number. Usually, it’s between 30 and 60 seconds. This error is prone to pop up when installing or updating themes, plugins, or WordPress core.
Why Does the max_execution_time Error Happen?
Every WordPress site has a maximum execution time limit for processing server requests. It’s meant to minimize server abuse. This limit looks at all the PHP scripts running on your site and blocks those running past the time limit
Most hosting companies enforce a max execution time that’s anywhere between 30 and 60 seconds. This range gives your PHP scripts enough time to complete their jobs, even if they take some time to execute.
In general, a 30-second time limit should work well for high-quality PHP scripts. However, you may need to increase the limit to 60 seconds, depending on your code and server response. Some developers may opt for as much as a 300-second maximum, but anything over that isn’t a wise decision.
Sometimes hosting companies may set the maximum execution time too low for your site. It’s a pretty common situation, and you can resolve it by reaching out to your hosting provider.
How to solve max_execution_time error problem?
There are four ways to solve the max_execution_time error problem in WordPress.
- Editing the .htaccess file
- Changing the the php.ini file.
- Modifying the wp-config.php file.
- Changing the time limit via the cPanel.
Step 1. Manually Editing .htaccess File
- Open the File Manager in IntroNexus Panel and navigate to the public_html directory. ( First check whether the .htaccess file is unhide )
- Press right click on .htaccess file and edit with editor.
- Insert the following code into the bottom of your .htaccess file:
php_value max_execution_time 60 - Press Save and Close.
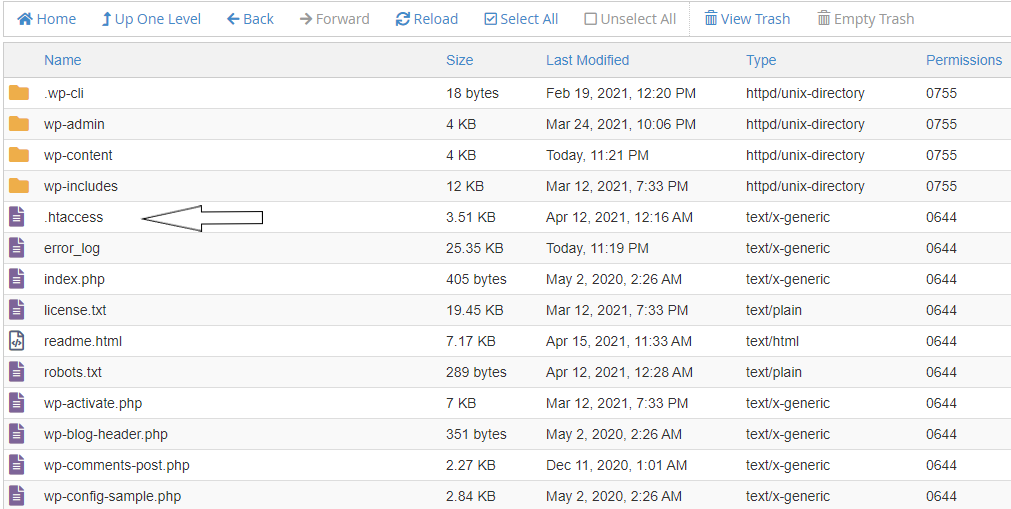
If you’re still getting the same error, you can try increasing the value to 120-180 seconds.
Step 2. Changing the the php.ini file.
Another file that’s not as common with web hosts is called php.ini. It’s another option for increasing your execution maximum time.
- Open the File Manager in IntroNexus Panel and navigate to the public_html directory. ( First check whether the .php.ini file is unhide )
- Press right click on .php.ini file and edit with editor.
- Insert the following code into the bottom of your .php.ini file:
php_value max_execution_time 60 - Press Save and Close.
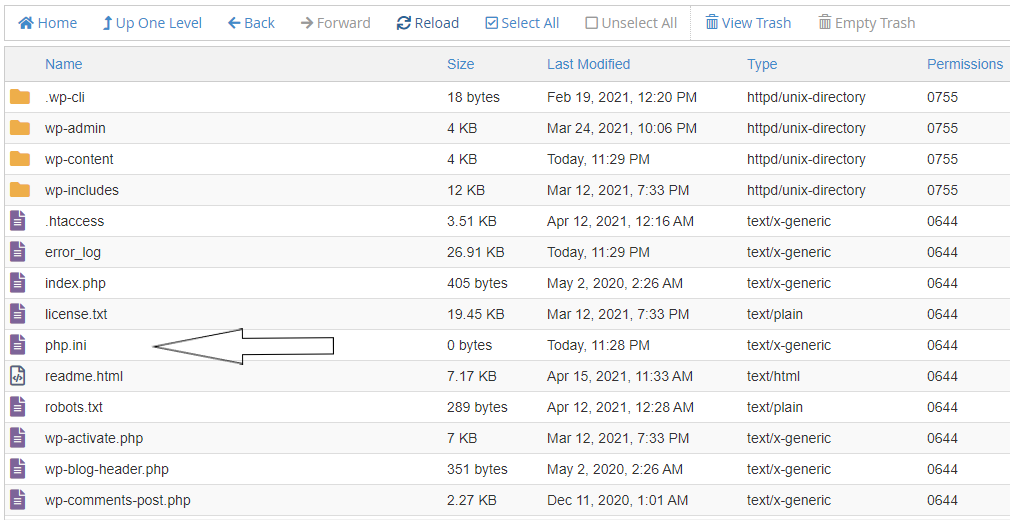
If you’re still getting the same error, you can try increasing the value to 120-180 seconds.
Step 3. Modifying the wp-config.php file.
As for handling the WordPress max_execution_time error, one way to solve the issue requires you to open the wp-config.php file.
- Open the File Manager in IntroNexus Panel and navigate to the public_html directory.
- Press right click on .wp-config.php file and edit with editor.
- Insert the following code into the bottom of your .php.ini file:
set_time_limit(300); - Press Save and Close.
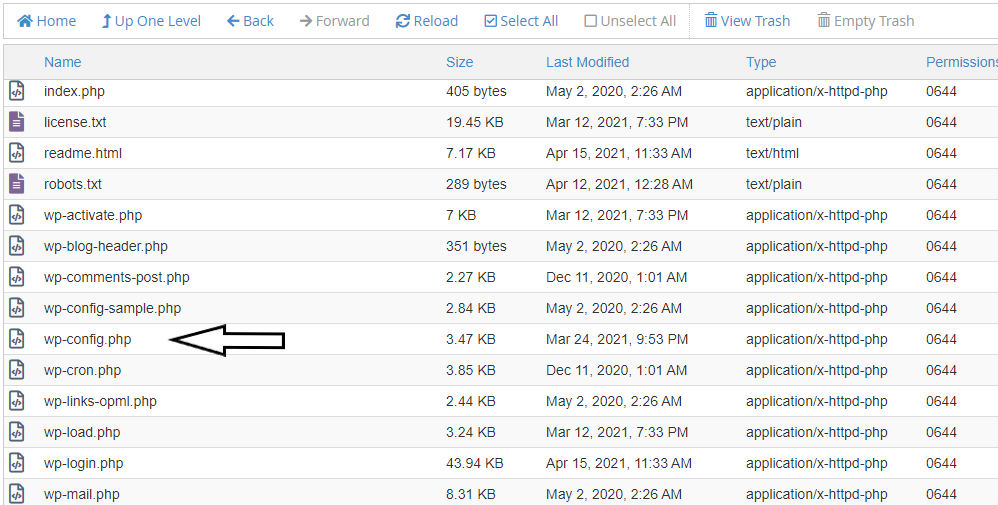
If you’re still getting the same error, you can try increasing the value to 120-180 seconds.
Step 4. Changing the time limit via the cPanel
You can also increase the WordPress max_execution_time directly from MultiPHP INI Editor option in cPanel.
- Login to IntroNexus Dashbord and click on login to cpanel option after that find MultiPHP INI Editor option in cPanel.
- in configure PHP INI basic settings select your domain and find max_execution_time option.
- Increase the default value as needed and click apply.
That’s it! you have successfully increased the WordPress max_execution_time limit of your PHP script!
There you have it, easy and quick fixes! If you’re using shared hosting services and none of the solutions worked for you, contact your hosting provider and ask if it’s possible to increase the maximum execution time. Good luck!
This article help me a lot for solving this problem