How to Increase and fix the Max Upload file Size Problem in WordPress : Are you having trouble uploading large size files to your WordPress site and are you getting error of exceeds the maximum upload size for this site while uploading your WordPress theme and plugins?
Depending on your hosting provider and server, there are many ways to go about solving this issue. We’ve got you covered! Here, we will uncover How to Increase and fix the Max Upload file Size Problem in WordPress. By the end of the article, you will know how to modify the upload limit to meet your needs.
Let’s begin!
Contents
What Is the Maximum Upload Size in WordPress?
Uploading large files to the server consumes a large amount of server resources. this causes you to face an error like server time out. the default maximum upload size in WordPress typically ranges from 4 MB to 128 MB. Usually, the hosting provider sets this limit at the server level.
To verify this, go to your WordPress site’s Media Library. Here, try to upload a file that crosses this maximum upload file size limit. You’ll see an error message that looks something like this:
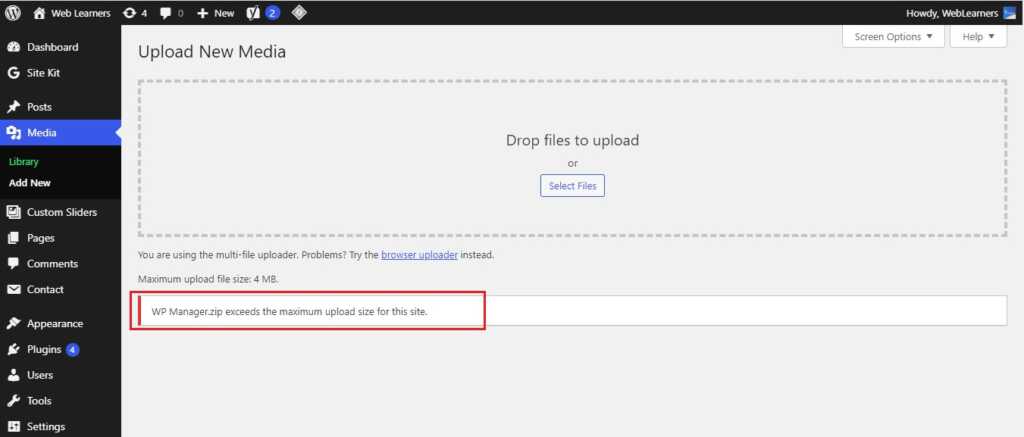
The “exceeds the maximum upload size for this site” error can be frustrating, but it exists for two main reasons: security and efficiency. It hinders site owners and other users, including malicious actors, from uploading huge files (e.g. high-resolution images, large videos).
Otherwise, it can result in incapacitating your website’s server, making your site come to a crawl. Or worse, it can bring your site down altogether!
5 Ways : How to Increase and fix the Max Upload file Size Problem in WordPress
- Modifying .htaccess File
- Configuring php.ini File
- Editing functions.php File
- Modifying wp-config.php File
- Contact Your Hosting Provider
Modifying .htaccess File
If your web server is using Apache and PHP is set as an Apache module, then you can add a few lines of code in your WordPress .htaccess file to increase the max upload size in WordPress.
To edit .htaccess file in WordPress, go to your root directory. This can be done by using the file manager provided by your web hosting provider.
Log into your web hosting account, navigate to the ‘public_html’ folder and look for the .htaccess file in WordPress installation.
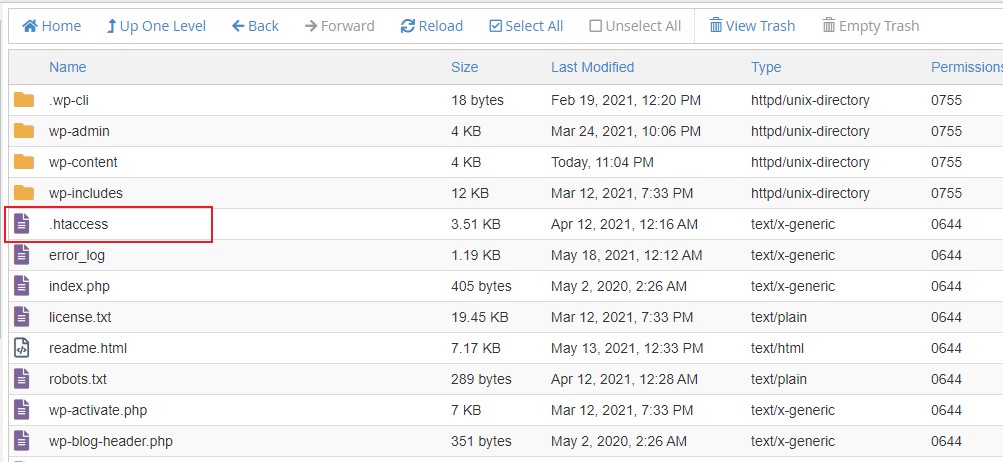
Right-click and click on the ‘View/Edit’ option to open it in your preferred text editor.

Open the .htaccess file with a text editor or code editor, and then add the following code.
php_value upload_max_filesize 32M
php_value post_max_size 64M
php_value memory_limit 128M
php_value max_execution_time 300
php_value max_input_time 300
Make the required changes and save the file
You can notice two other PHP directives in the above code: max_execution_time and max_input_time. They define how long a server spends on a single PHP task. The bigger your uploads, the bigger the time spent will be. You need to set their values to a number that’s appropriate for your use case.
Configuring php.ini File
This is a default file used to configure any application which runs on PHP. This file contains parameters required for file timeout, upload size, and resource limits. Access your WordPress root directory using File Manger or FTP and look for a php.ini file. In some cases, this file is not visible to the other option would be to create a new file instead.
To edit php.ini file in WordPress, go to your root directory. This can be done by using the file manager provided by your web hosting provider.
Log into your web hosting account, navigate to the ‘public_html’ folder and look for the php.ini file in WordPress installation.
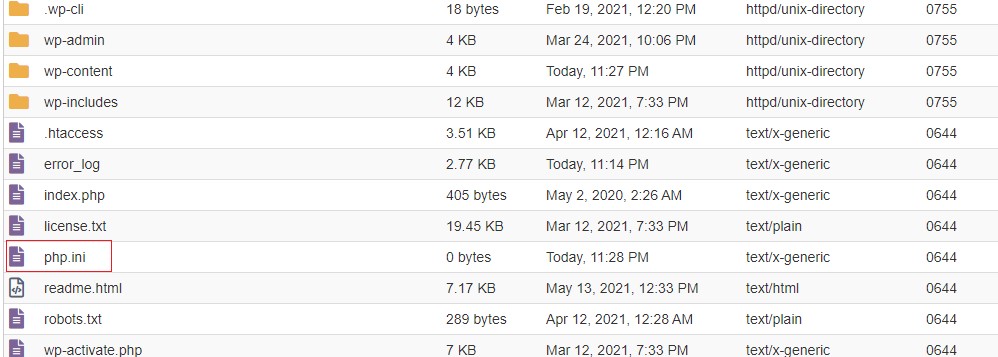
Right-click and click on the ‘View/Edit’ option to open it in your preferred text editor.
Open the php.ini file with a text editor or code editor, and then add the following code.
upload_max_filesize = 25M
post_max_size = 13M
memory_limit = 15M
Make the required changes and save the file
Editing functions.php File
In some cases, you might not be able to access your .htaccess file or you are more comfortable editing WordPress theme files.
You can easily increase the size limits by adding the following lines of code in the functions.php file of your theme.
However, remember if you change the theme then max upload size will return to its default values until you edit the functions.php file of the new theme.
@ini_set( 'upload_max_size' , '64M' );
@ini_set( 'post_max_size', '64M');
@ini_set( 'max_execution_time', '300' );
Modifying wp-config.php File
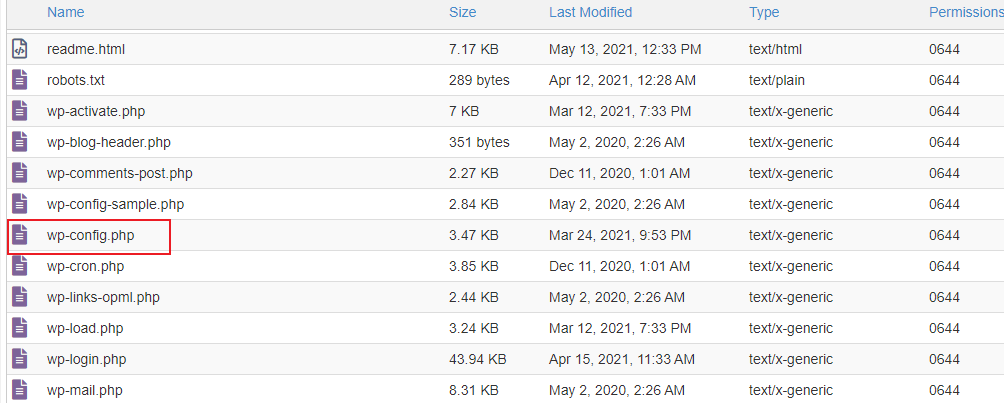
Another way of increasing the upload size in WordPress is to define the size parameter in the wp-config.php file. To do that, access your WordPress root directory using File Manager or FTP and locate a wp-config.php file.
Open the file in any text editor and add the following code.
@ini_set( 'upload_max_size' , '20M' );
@ini_set( 'post_max_size', '13M');
@ini_set( 'memory_limit', '15M' );
Save your changes and it should increase your file upload size.
Contact Your Hosting Provider
If you do not want to edit the files yourself then you can always contact your hosting provider to do it for you.
I hope you must have got clarity on How to Increase and fix the Max Upload file Size Problem in WordPress.
If you enjoyed this article, then you’ll love IntroNexus’s WordPress hosting platform. Boost your website and get 24/7 support from our WordPress team. Let us show you the IntroNexus difference! Check out our plans
Also Read : What Folder Should I Upload My Files To
Best Web Hosting in India
Best Web Hosting Company in Bangalore
Best Website Hosting Company in Delhi
Best Web Hosting Jaipur India
Best Web Hosting Company Chennai
Best Web Hosting in Mumbai India
Best Web Hosting Kolkata India
Best Web Hosting Company Pune India
IntroNexus Hosting Review
Connect with IntroNexus Via :
- Facebook : IntroNexusHost
- YouTube : IntroNexus
- Instagram : IntroNexus®
- Twitter : IntroNexus