WordPress is a state-of-the-art blogging platform with a focus on aesthetics, web standards, and usability. wordpress is also one of the web’s most popular content management systems (CMS). cPanel includes an automatic installer that you can use to set WordPress up on your domains for you.
WordPress maintains a central repository for its latest software releases at www.wordpress.org. You can download and set up the software manually or use an automatic script installer like softaculous.
In this guide, we will show you how to use softaculous to set up WordPress on your site via Cpanel. The entire procedure is fast, user-friendly and intuitive.
Prerequisites : Install WordPress from cPanel
- A domain name e.g. www.example.com
- Web hosting account that supports Cpanel, PHP and MySQL
- Cpanel username and password.
Contents
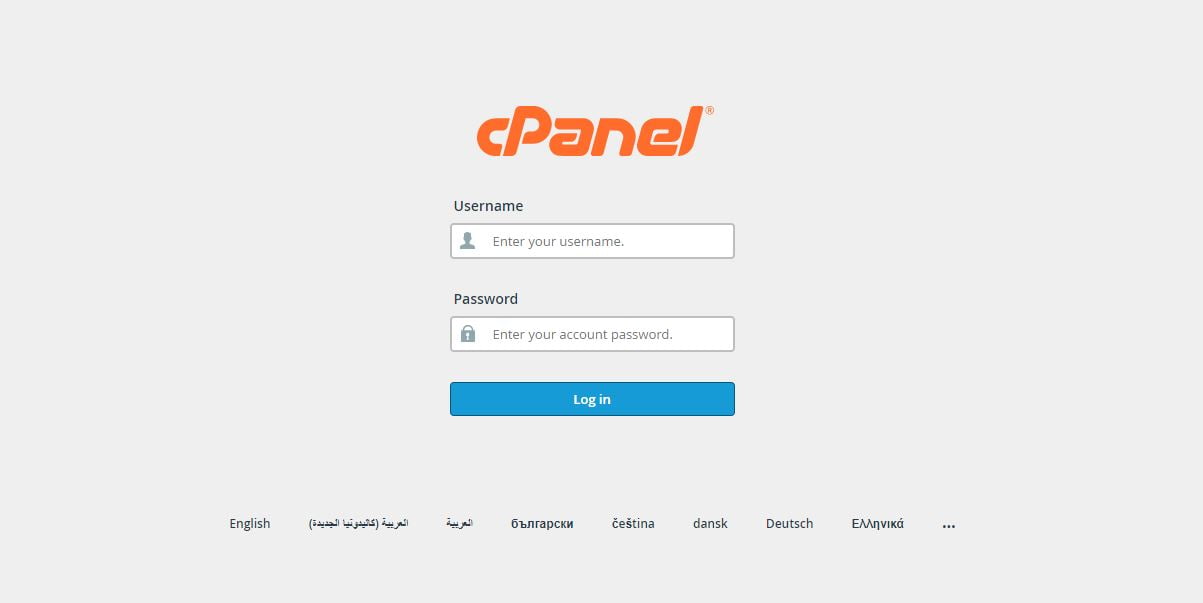
Step 1: Log to your Cpanel Account
Assuming that ‘example.com’ is the primary domain name associated with your hosting account, you can log in to your cPanel account by typing www.example.com/cpanel on your browser. Then, enter your username and password that you received from your web hosting provider when you set up an account with them as shown below.
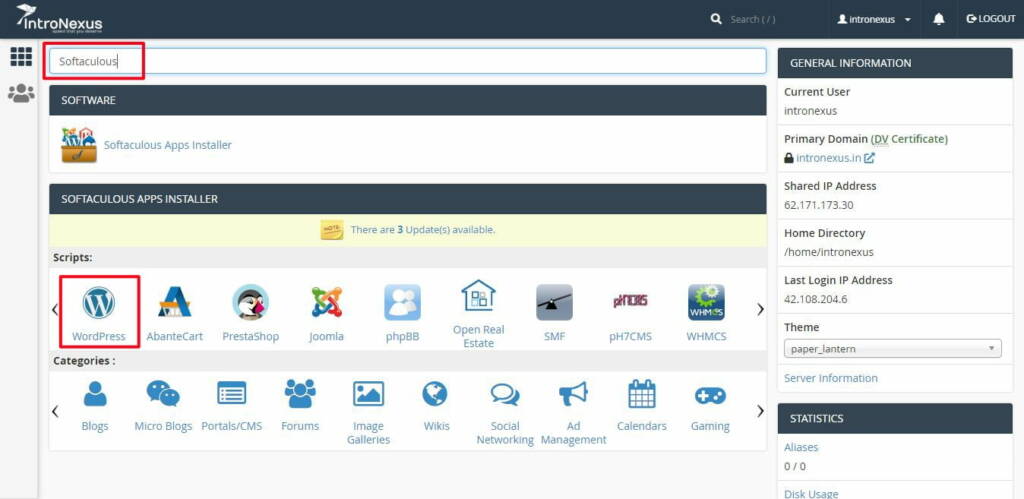
Step 2: Locate Softaculous apps installer
On the next screen, you will see the Cpanel dashboard, locate the text box that reads, “Find functions quickly by typing here:” Just enter the name ‘Softaculous’. The script installer will be displayed below together with all apps that it supports. Click ‘WordPress’ and proceed as shown below:
Step 3: Choose a protocol and a domain name
On the next screen, you will see a brief description of the WordPress version that you are about to install on your website, click on the button labeled ‘Install’. You will be taken to the ‘Software Setup’ page as shown below:
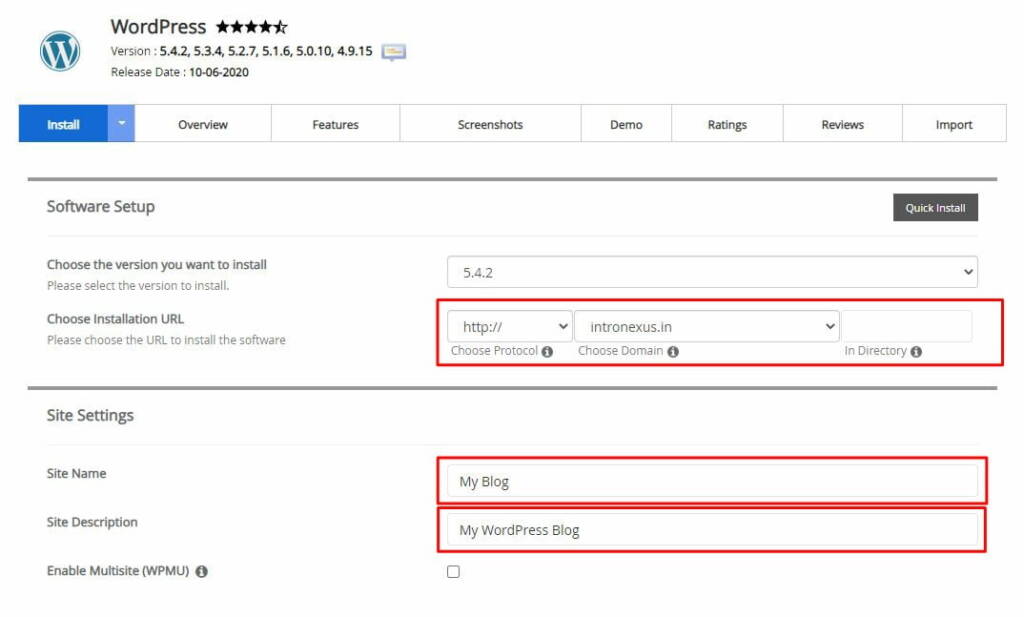
Choose your desired protocol. The recommended one is ‘http://www.’ or ‘https://www.’ Use https only if you have an SSL certificate for your domain.
Then choose your domain below. You can leave the ‘In Directory’ textbox blank unless you want to install WordPress under a subfolder.
Step 4: Fill WordPress site settings detail
Next, you will see your website settings as shown below:
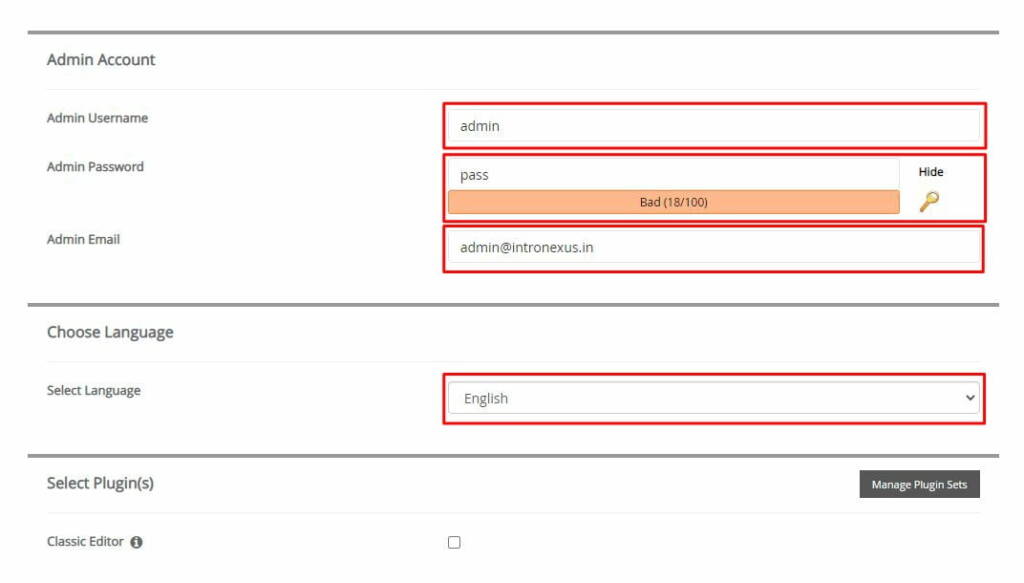
Enter the name of your website and a brief description. Then, choose an admin username, password, and email. You will need these details to log in to your WordPress admin panel, so choose a strong password. Select your preferred language and scroll down to proceed.
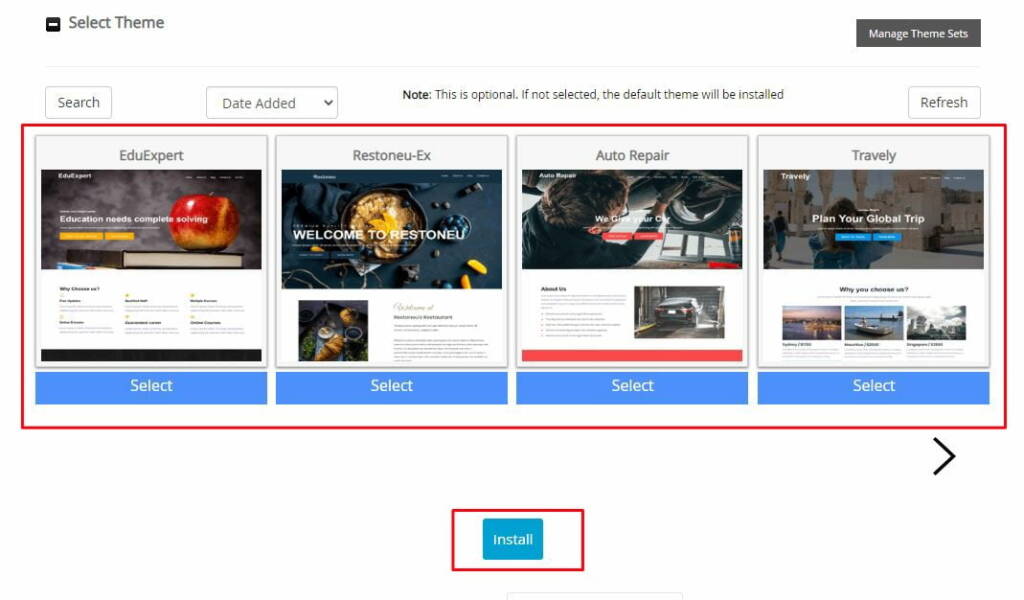
Step 5: Choose plugins and a theme
The next screen displays an option where you can install some plugins (this is optional), then choose your desired theme. Remember to supply your email address one more on the text box that reads, “>Email installation details to”. Finally, click on the ‘Install’ button.
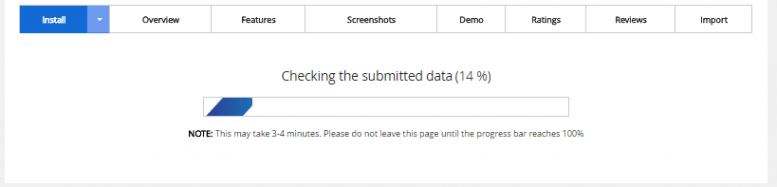
The Softaculous apps installer will check the submitted data and make WordPress Installation on your website
We will then take you to the congratulations screen as shown below and send an email with your WordPress installation details to the address that you entered above.
Congratulations, the software was installed successfully
WordPress has been successfully installed at:
http://www.example.com
Administrative URL : http://www.example.com/wp-admin/
We hope the installation process was easy.
NOTE: Softaculous is just an automatic software installer and does not provide any support for the individual software packages. Please visit the software vendor’s website for support!
Regards,
Softaculous Auto Installer
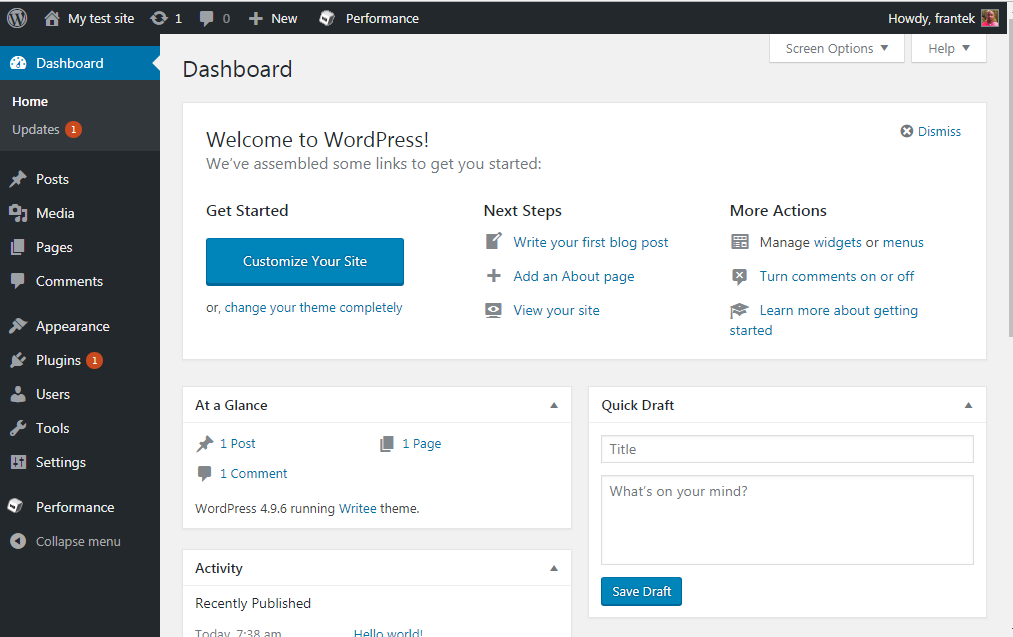
Step 6: Test the Installation
Log in to your WordPress site by typing the administrative URL e.g. http://www.example.com/wp-admin/
We have completed your installation, and we will direct you to your WordPress dashboard, as shown below.
Also Read :
How to Configuring addon domains in cPanel
WordPress Site Stuck in Maintenance Mode (Solved)
Best Web Hosting in India
Best Web Hosting Company in Bangalore
Best Website Hosting Company in Delhi
Best Web Hosting Jaipur India
Best Web Hosting Company Chennai
Best Web Hosting in Mumbai India
Best Web Hosting Kolkata India
Best Web Hosting Company Pune India
IntroNexus Hosting Review
Connect with IntroNexus Via :
- Facebook : IntroNexusHost
- YouTube : IntroNexus
- Instagram : IntroNexus®
- Twitter : IntroNexus